Intro
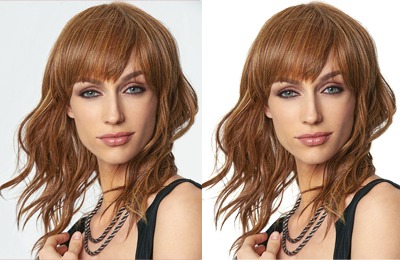
If you want to learn about photo editing by using Photoshop then Background removal by using Photoshop will be the easiest step. In Photoshop you have a lot of options to remove the photo background. If you are thinking of making ready a new background with different subjects then you must need to remove the background first. Ultimately it will be the first step to start your work.
Photoshop has different tools to erase or remove the selected area of a photo or to remove the whole photo background. It’s a tricky art of photoshop. So you require the basic knowledge of using the photoshop tools not necessary to be a graphics designer. If you have expertise in photoshop background removal you can do clipping path. Because now a day commerce industry is growing and every eCommerce must require the photo clipping path service.
Easy way to remove the background using photoshop
You will come to know about so many backgrounds removing tools. All are easy to do but you need to be skilled to remove the background perfectly. Some tools are very easy to use & take a little bit of time to remove the background completely. Using pen tools can be a tricky step & it may take more time to finish the work completely but perfectly.
You can use two types of background removing tools. Eraser tools & Pen tools. These tools will work for the same reason but with different results. Follow the below instructions to let you know the easiest & quick methods of removing background by using photoshop tools.
Select Eraser tool
It’s an easy tool to remove backgrounds like the same color objects. Not so difficult to delete a similar pixel color. Sometimes it can be difficult to find out the eraser tool from the tools list of photoshop. First, you should open an image in photoshop & select the eraser tool from the toolbox. It can be a hidden mood for beginners. Under the eraser tool, you can select that tool. Simply click the eraser tool & hold it for a while. Or you can press the button Shift + E to explore the background eraser. You can also press the Shift & E twice to select this tool.
Select the brush size & shape
Now from the tool options bar select the perfect shape & size brush as you need to remove the selected area. Here you have a quick scaling option to resize the brush. Use the bracket key ([ or ]) for quick scaling. Or you can right-click on the mouse right side on the artboard area to change the shape & size. Next, you should limit the sampling set to continue removing the background & find edges which tolerance range should be 20 to 25%.
Remove Selected Backgrounds
Make sure the brush size through the crosshairs at the center of the brush. By checking out the Hotspot to delete the inside color of the brush area. That the smart color extraction edges remove the color halos which will be even visible to other foreground objects.
Refine the Edges
If you have started with a low tolerance you can still manage it. Zoom in to make sure the selected colored area. It may have a similarity between the background & the subjects. Reduce the brush to 1px to capture the smallest of all details. Now come to the refined Edges by marching ants from the pop-up menu. This will help you to find a better selection by fine-tuning. Select the view mode with “on white” or other to get the sharp contrast. Then adjust the edge to increase the image smoothness value. To adjust the additional slider with smooth condition click Ok after completing the adjustment.
Use a quick mask or the Pen Tool
Here the final step to review the total customization. Right-click with the selection & choose the layer to copy. That will assign a new layer, without editing the original image. You can Toggle off the visible original background. To get a final touch & make sure all tiny portions of the background color combination or the subject’s shape you should apply the pen tool. You can go straight forward while the background color is totally different & clear to select. The portion which is wrongly deleted by the eraser tool you can avoid this mistake by using this tool. But using this pen tool you can easily repair the foreground & background similar color due. Delete the unwanted background portion by selecting that portion. Now see the final result according to the need.
Final thought
Photoshop is a highly professional software to perform all photo editing difficulties. To beginners, it can be a little bit difficult to use different photo editing tools under different editing sections. Background removal by using photoshop is sometimes easier & quick than any other task. That only depends on image complexity. The most complex need to use a mix of tools to set the sampling & tolerance ranges. Use multiple manual settings for multiple reasons.

